설치
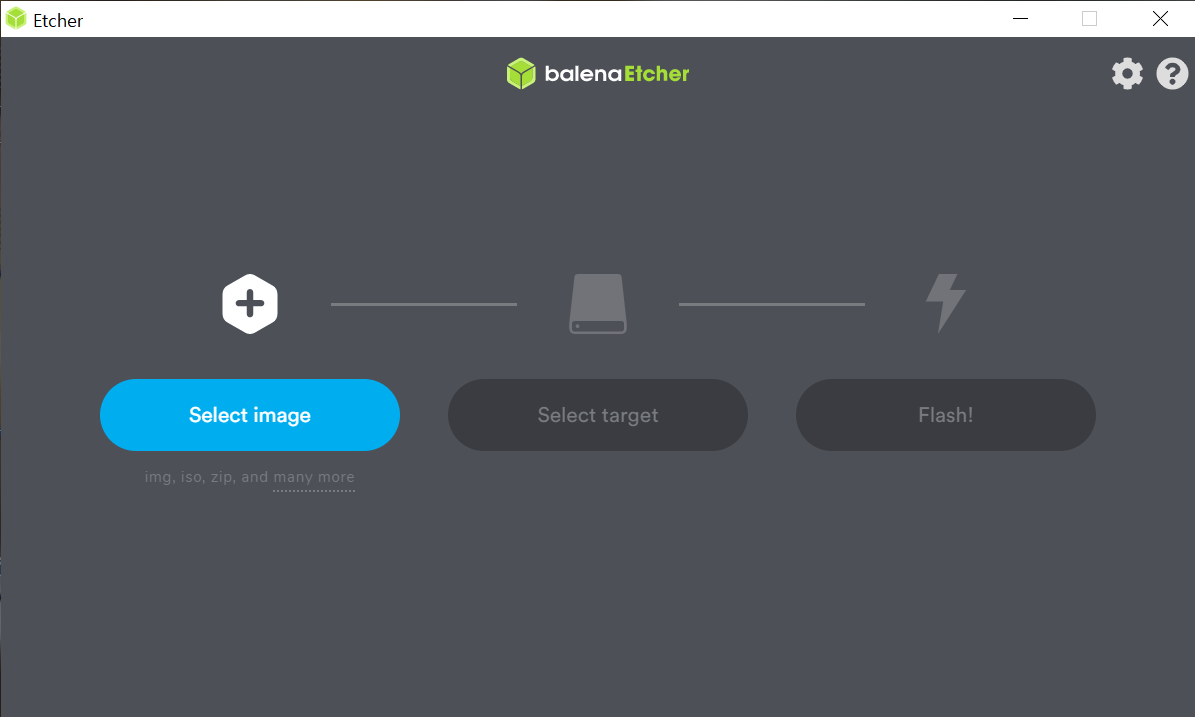
크롬 확장 기능 또는 파이어폭스 플러그인으로 셀레늄 IDE를 사용할 수 있습니다. 셀레늄 IDE 공식 홈페이지에서 플러그인을 설치하세요.
참고:
이 글에서 소개하는 셀레늄 IDE는 버전 3입니다. 버전 4는 현재 개발 중이며, 브라우저 없이 독립 실행 가능하도록 일렉트론(Electron) 기반으로 구현되고 있습니다1.
기록
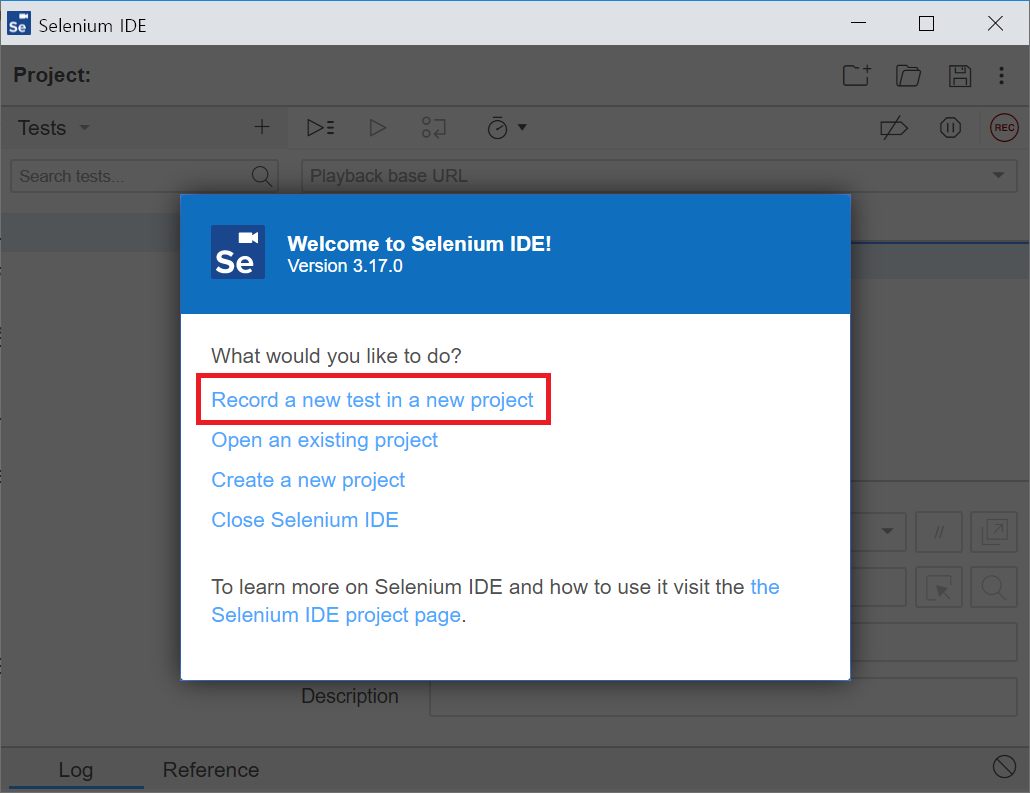
셀레늄 IDE를 실행한 뒤 곧바로 ‘Record a new test in a new project’를 클릭해 기록을 시작할 수 있습니다.
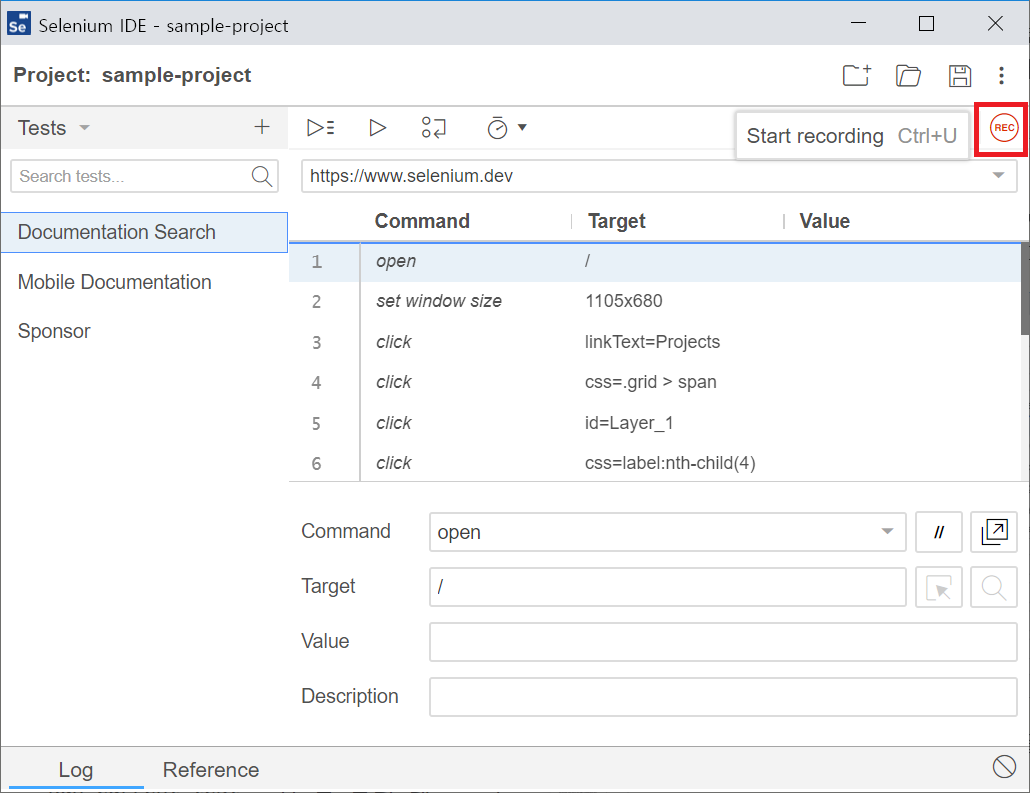
또는 ‘Start recording’을 눌러 기록을 시작할 수도 있습니다.
기록을 시작하기 전에 먼저 프로젝트 이름과 베이스 URL을 설정해야 합니다.
용어 설명: 프로젝트
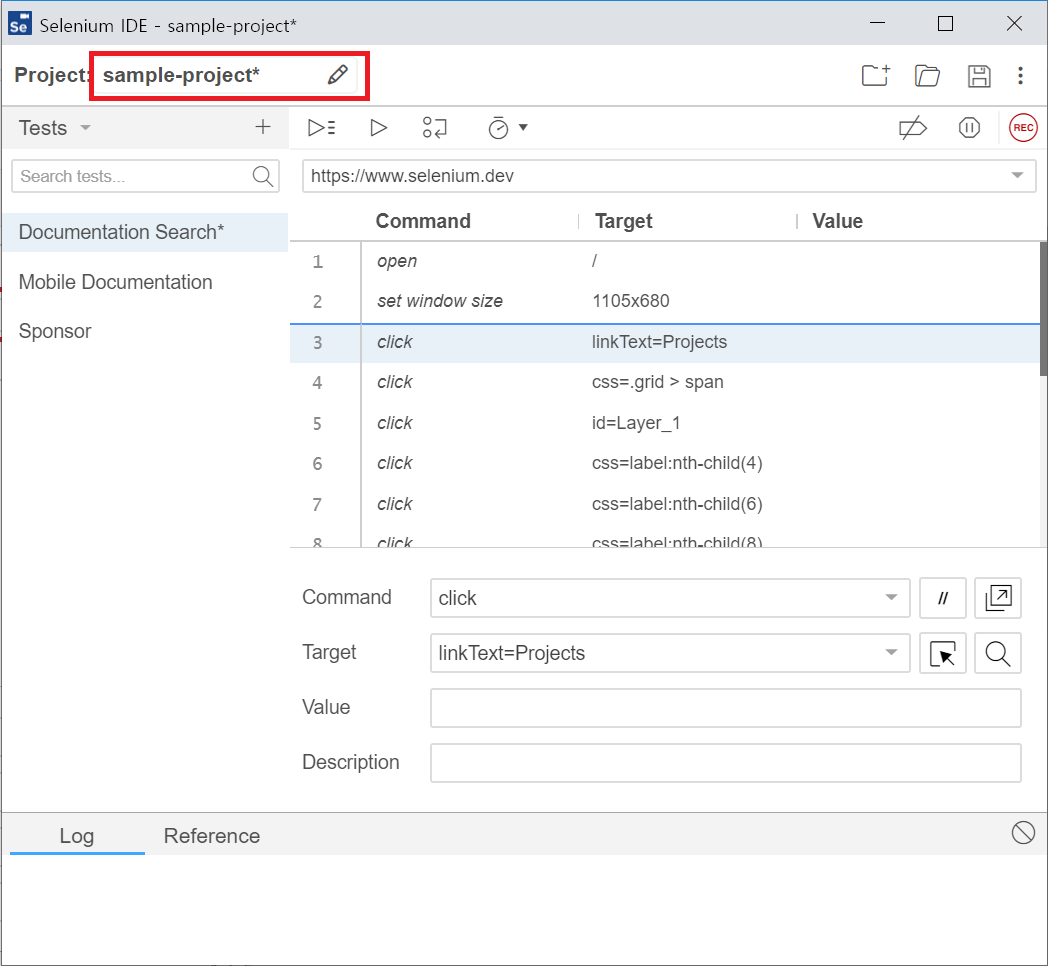
셀레늄 IDE는 프로젝트 단위로 파일을 저장하거나 불러옵니다. 이때 사용할 프로젝트 이름을 미리 설정해야 합니다.
프로젝트 파일은 .side 확장자로 저장됩니다. .side는 내부적으로 JSON 형태를 가집니다.
용어 설명: 베이스 URL
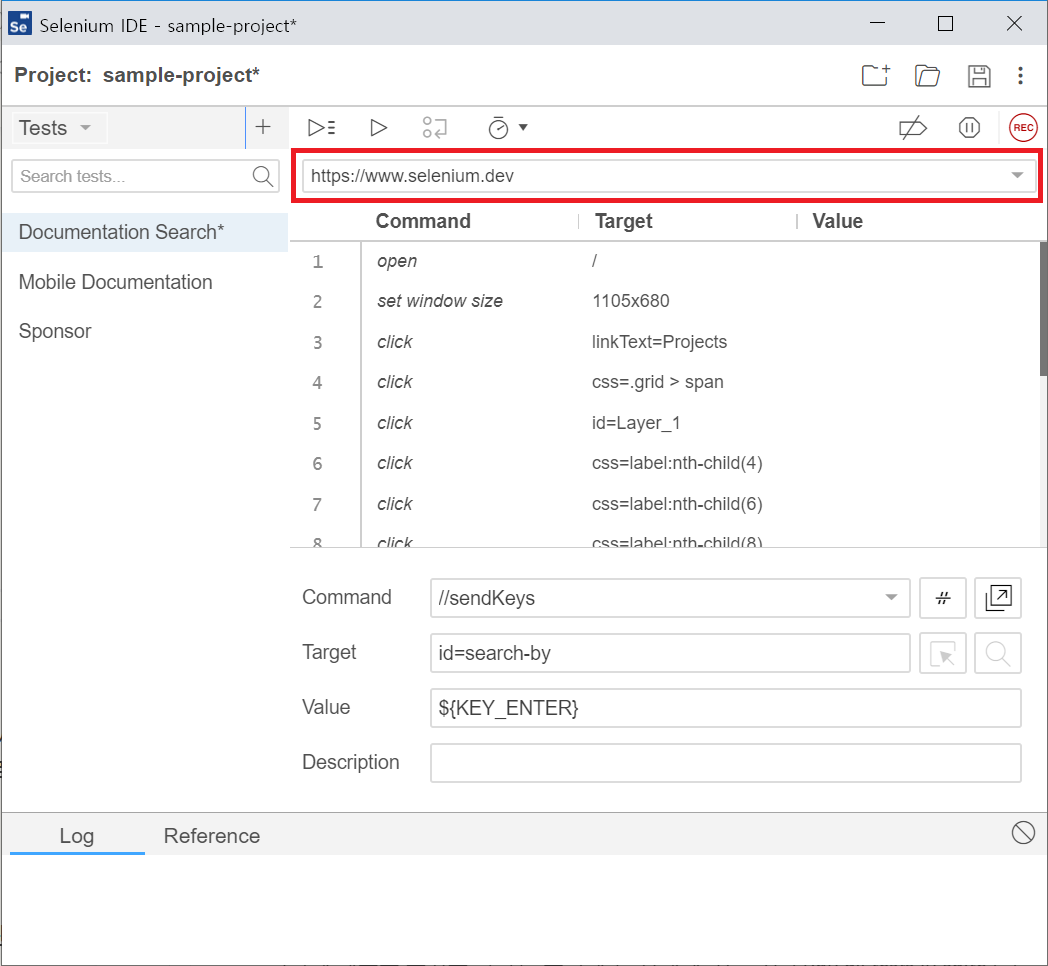
베이스 URL(base URL)은 기록을 처음 실행할 때 시작할 웹 사이트의 URL입니다.
하나의 프로젝트 당 하나의 베이스 URL을 가질 수 있습니다. 각 테스트 별로 베이스 URL을 지정할 수는 없습니다.
기록을 위한 새 창
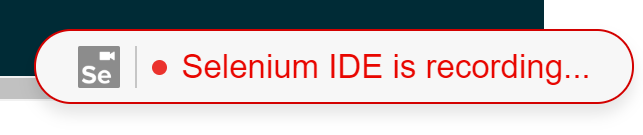
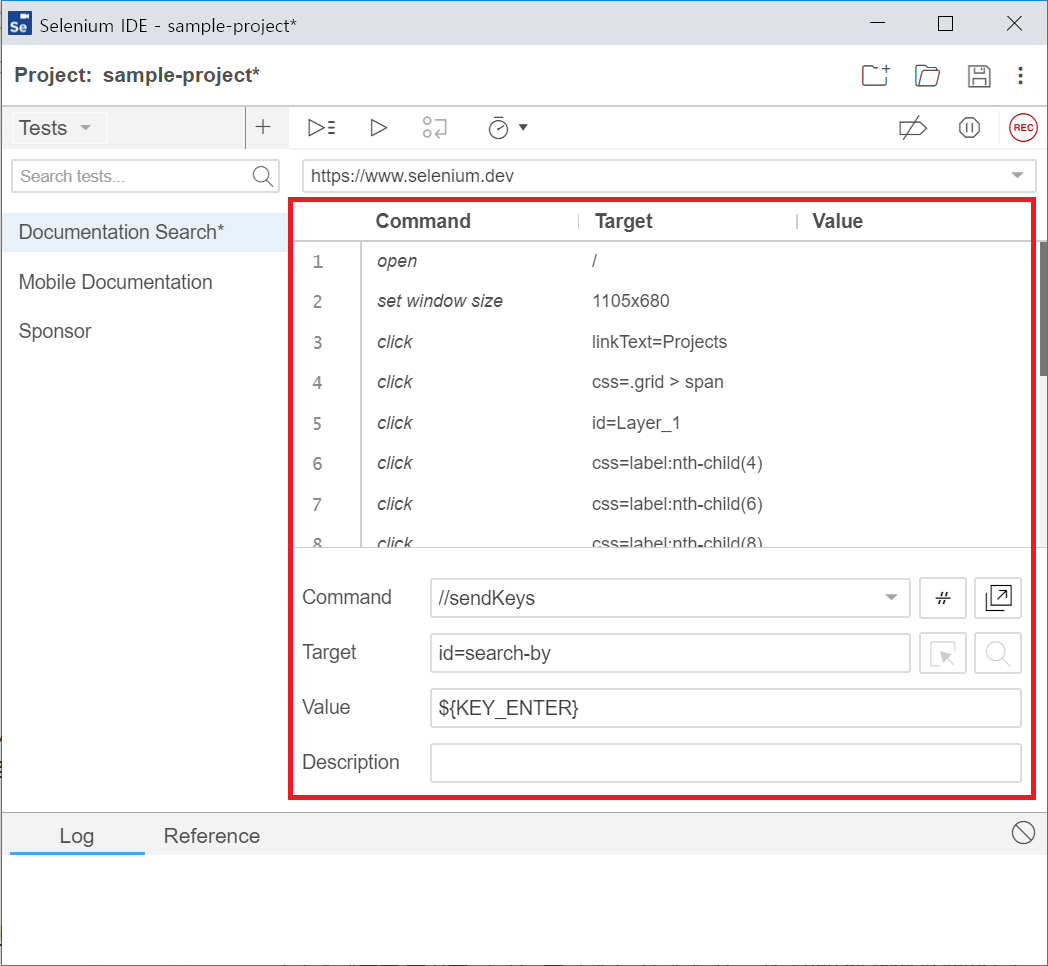
기록이 시작되면 새로운 웹 브라우저 창이 열립니다. 기록 중이라는 메시지가 브라우저 오른쪽 아래에 나옵니다. 이제 이 브라우저에서 기록하고자 하는 동작을 수행하면 됩니다.
사용자가 행하는 동작은 명령어로 기록됩니다.
용어 설명: 명령어
명령어(command)는 클릭하기, 타이핑하기, 브라우저 창 크기 조절하기와 같이 브라우저에서 행하는 동작을 의미합니다. 기록되는 동안 웹 브라우저에 대한 조작이 명령어로 만들어집니다.
실행
‘Run current test’ 버튼을 눌러 기록한 명령어들을 실행합니다. 새로운 웹 브라우저가 열리며 명령어에 따라 순차적으로 동작합니다.
저장
‘Save project’ 버튼을 눌러 프로젝트를 저장합니다.
참고:
웹 브라우저 환경에서는 그 특성 상 특정 파일의 경로에 직접적으로 파일을 쓰거나 읽을 수 없습니다. 반드시 ‘다른 이름으로 저장’이나 ‘열기’를 통해 사용자가 직접 읽거나 쓸 파일을 선택해야 합니다. 이러한 이유로 인해 셀레늄 IDE는 프로젝트를 저장할 때마다 매번 저장할 위치를 지정해야 하는 번거로움이 있습니다2.
저장되지 않음 표시
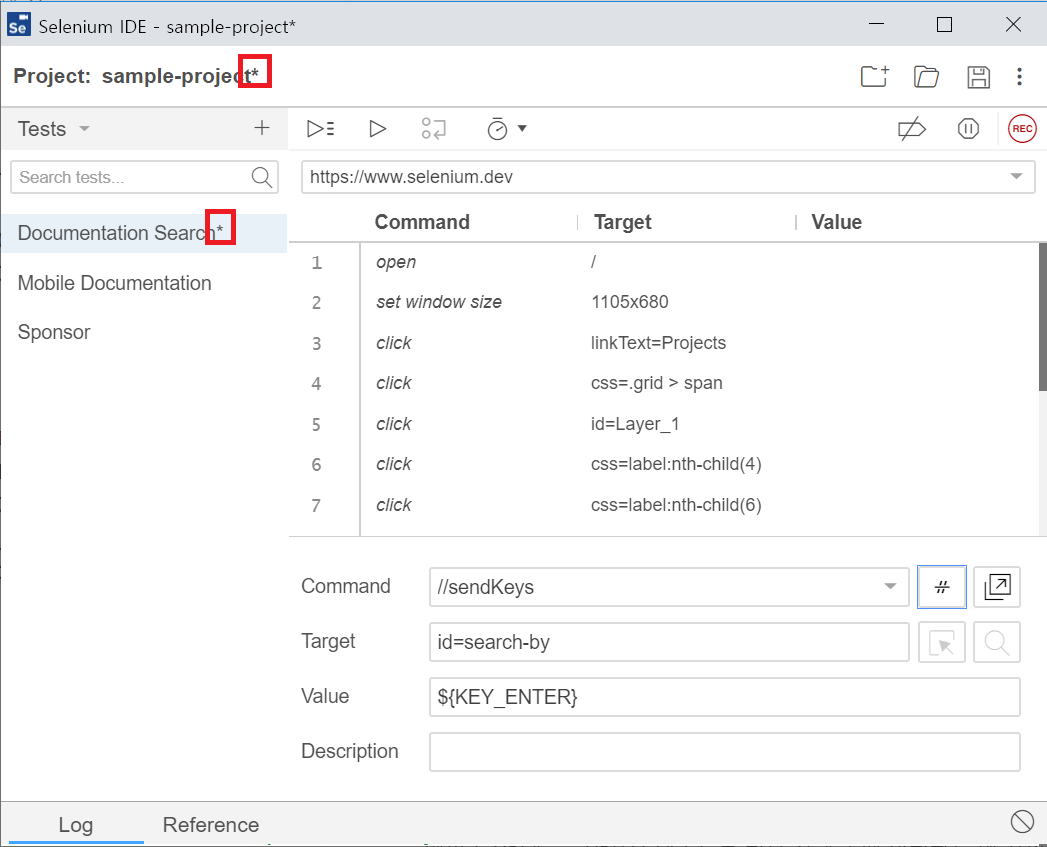
프로젝트, 테스트, 테스트 스위트 이름 뒤에 ‘*‘이 붙어있을 때가 있습니다. 이는 변경된 내용이 아직 저장되지 않았음을 의미합니다.
테스트/테스트 스위트 목록
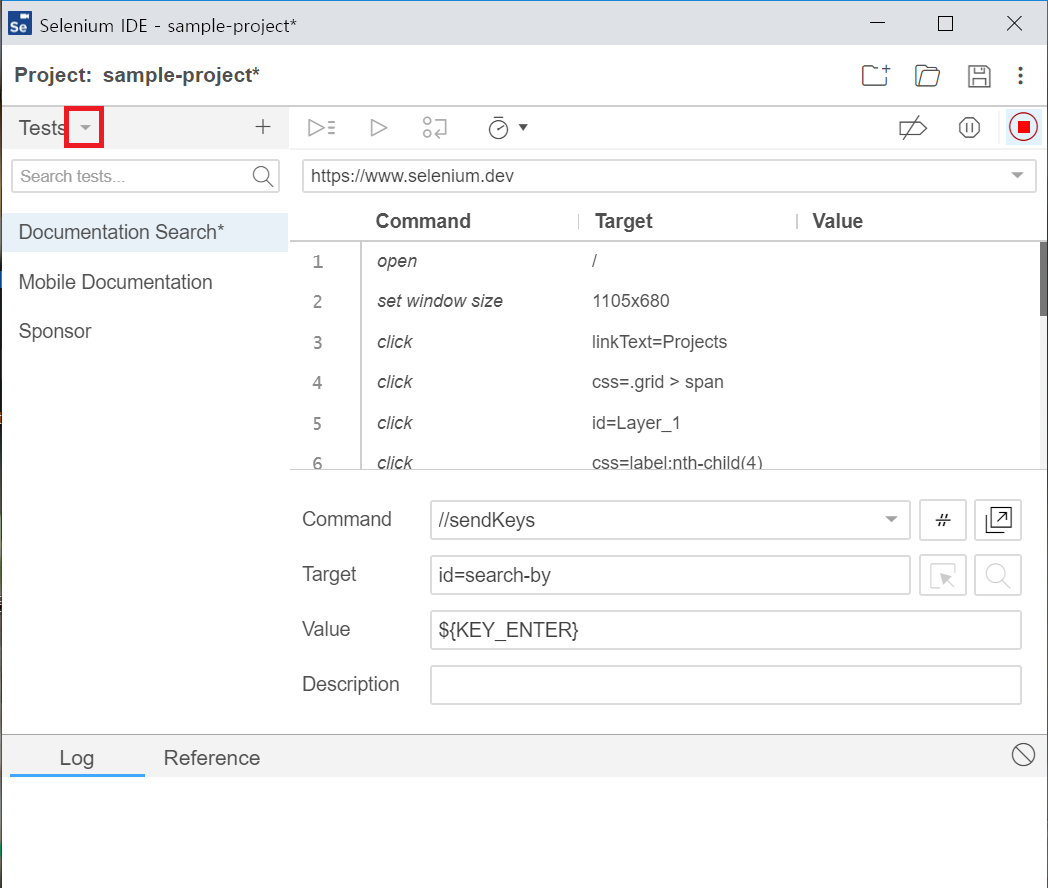
아래 화살표 버튼을 눌러 테스트와 테스트 스위트 목록을 전환할 수 있습니다. (이외에도 ‘Executing’이라는 목록이 있습니다. 이 목록은 현재 실행 중인 테스트를 보여줍니다.)
테스트에 관한 설정은 테스트 목록에서, 테스트 스위트에 관한 설정은 테스트 스위트 목록에서만 가능합니다. 테스트 스위트 목록인 상태에서는 테스트를 생성할 수 없습니다. 그 반대도 마찬가지입니다.
용어 설명: 테스트
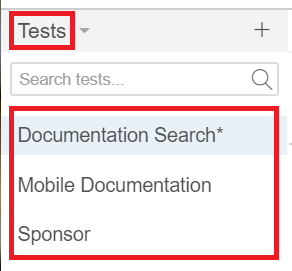
테스트(test)는 여러 명령어들을 순서대로 나열해놓은 것입니다. 하나의 프로젝트에 여러 테스트가 존재할 수 있습니다.
참고:
이것이 테스트라고 불리는 이유는, 이 용어가 J유닛의 테스트와 관련이 있기 때문으로 보입니다. 셀레늄 IDE는 작성한 테스트를 J유닛의 테스트로 내보낼 수 있는 기능을 제공하는데요(하단 참조), 이때 셀레늄 IDE의 테스트 하나는 J유닛의 테스트 하나로 변환됩니다.
용어 설명: 테스트 스위트
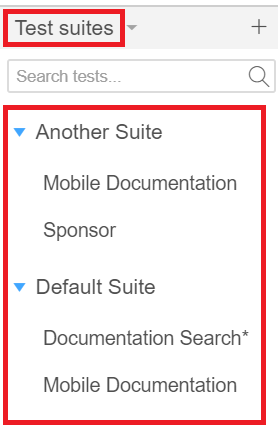
테스트 스위트(test suite)는 여러 테스트의 집합입니다. 테스트 스위트를 이용해 테스트를 목적에 따라 분류할 수 있습니다.
테스트가 새로 만들어지면 기본적으로 ‘Default Suite’에 속합니다.
주의: 하나의 테스트는 여러 테스트 스위트에 속할 수도 있고, 그 어떤 테스트 스위트에도 속하지 않을 수도 있습니다.
참고:
앞서 언급한 테스트의 사례처럼, 이것을 테스트 스위트라 부르는 이유 역시 J유닛의 테스트 스위트에서 따왔습니다. 셀레늄 IDE의 테스트 스위트 하나는 J유닛의 테스트 스위트 하나로 변환됩니다.
테스트, 테스트 스위트 추가
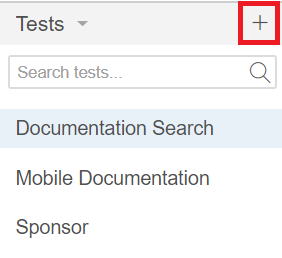
테스트 목록인 상태에서 ‘+’ 버튼을 눌러 테스트를 추가할 수 있습니다. 테스트 스위트 역시 마찬가지입니다.
주의할 점은 테스트 추가는 테스트 목록에서만, 테스트 스위트 추가는 테스트 스위트 목록에서만 가능하다는 것입니다. 테스트 목록인 상태에서 테스트 스위트를 추가할 수는 없습니다.
검색

검색어를 입력해 테스트를 찾을 수 있습니다.
이름 바꾸기, 복제, 삭제

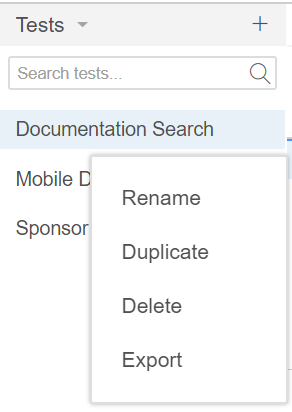
‘⋮’ 버튼을 눌러 이름을 바꾸거나 테스트 또는 테스트 스위트를 복제, 삭제할 수 있습니다.
테스트 스위트에 테스트 포함시키기
테스트 스위트 목록인 상태에서 ‘⋮’ 버튼을 클릭한 뒤, ‘Add tests’를 눌러 테스트 스위트에 테스트를 포함시킬 수 있습니다.
참고:
이 작업이 테스트를 생성하는 것은 아닙니다. 테스트를 생성하기 위해서는 반드시 테스트 목록인 상태에서 ‘+’ 버튼을 클릭해 테스트를 생성해야 합니다.
내보내기

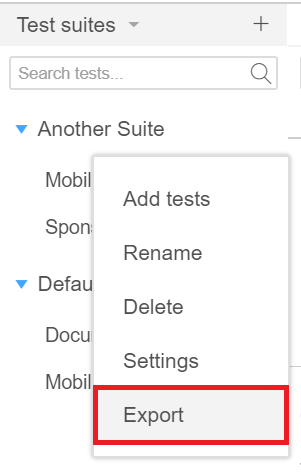
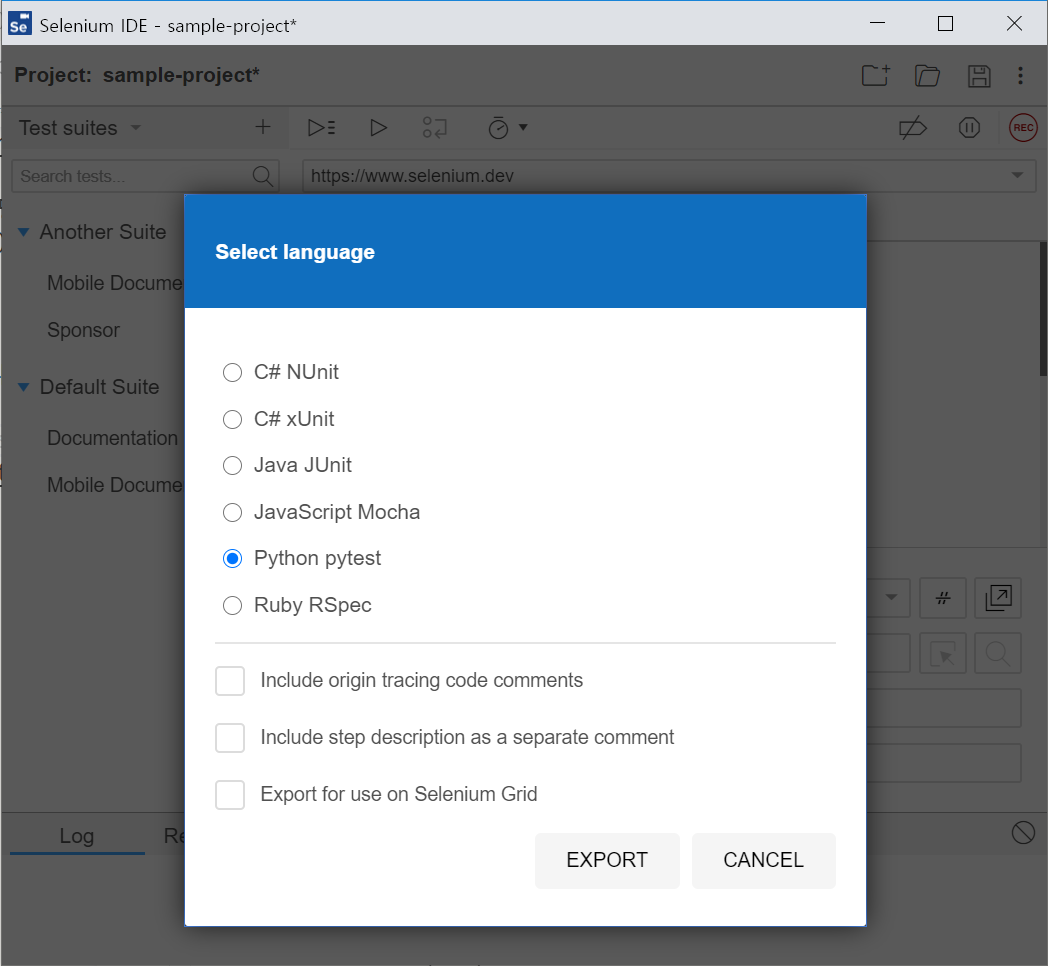
내보내기는 특정 테스트 혹은 테스트 스위트를 프로그래밍 언어로 변환할 수 있는 기능입니다. 자바의 J유닛(JUnit), 파이썬의 파이테스트(pytest)와 같은 테스트 프레임워크 기반의 코드가 생성됩니다.
현재 다음과 같은 언어 및 테스트 프레임워크를 지원합니다3:
- C# N유닛(NUnit)
- C# x유닛(xUnit)
- 자바 J유닛(JUnit)
- 자바스크립트 모카(Mocha)
- 파이썬 파이테스트(pytest)
- 루비 R스펙(RSpec)
새로운 언어나 테스트 프레임워크가 필요하다면 셀레늄 IDE에 기여해보세요.
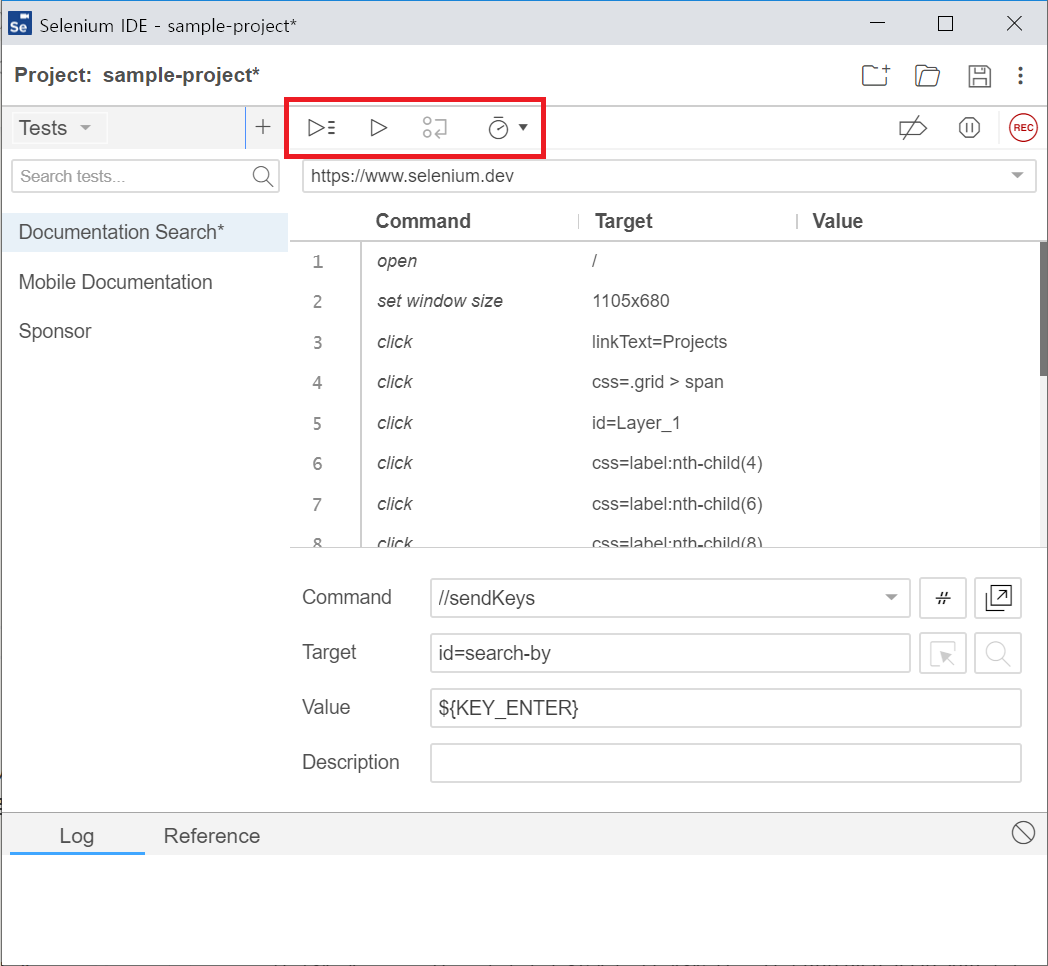
실행 및 관련 설정
참고:
여기서는 GUI로 실행하는 방법에 대해 다룹니다. CLI로 실행하는 방법은 이 글의 후반부에서 설명합니다.
전체 실행

좌측에 테스트 목록을 보이게 한 상태에서 ‘Run all tests’ 버튼을 눌러 모든 테스트를 실행합니다.
좌측에 테스트 스위트 목록을 보이게 한 상태에서는 버튼(‘Run all tests in suite’)의 동작이 테스트 스위트 내의 모든 테스트를 실행하는 것으로 바뀝니다.
현재 테스트 실행
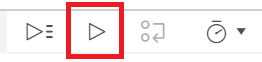
‘Run current test’ 버튼을 눌러 현재 활성화한 테스트를 실행할 수 있습니다.
한 줄씩 실행
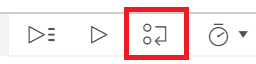
‘Step over current command’ 버튼을 눌러 테스트를 한 줄씩 실행할 수 있습니다.
테스트 실행 속도 조절
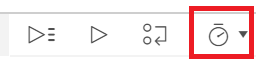
‘Test execution speed’ 버튼을 눌러 테스트의 실행 속도를 조절할 수 있습니다.
명령어
셀레늄 IDE는 조건문이나 반복문 같이 프로그래밍 언어에서 지원할 법한 명령어도 제공합니다. 이러한 명령어는 웹 브라우저의 사용을 기록하는 방식으로 만들 수는 없고, 대신 직접 명령어를 추가해야 합니다.
참고:
Commands - Selenium IDE에서 셀레늄 IDE가 제공하는 모든 명령어를 확인하세요.
중단점
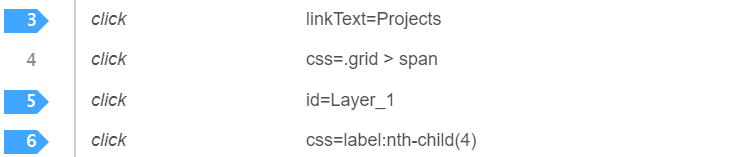
셀레늄 IDE는 테스트 실행 도중 특정 명령어에서 일시정지할 수 있는 기능을 제공하는데, 이를 중단점(breakpoint)이라 합니다.
명령어의 왼쪽 번호를 클릭해 중단점을 지정합니다.
테스트 실행 중 중단점을 만나면 테스트가 일시정지됩니다. ‘Run current test’를 눌러 테스트를 계속 진행할 수 있습니다.
중단점 비활성화
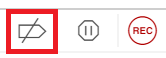
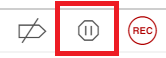
‘Disable breakpoints’는 모든 중단점을 비활성화합니다. 중단점을 만나도 테스트가 일시정지되지 않게 됩니다.
예외 발생 시 정지
웹 사이트의 변경으로 인해 클릭해야 할 버튼이 없어진다거나 하는 문제가 생길 수 있습니다. 이를 가리켜 예외라 합니다.
셀레늄 IDE는 일반적으로 예외가 발생하면 테스트를 종료합니다. ‘Pause on exceptions’ 버튼을 클릭하면 예외가 발생했을 때 테스트를 종료하는 것 대신 마치 중단점처럼 테스트를 일시정지합니다.
자바스크립트 실행
execute script, execute async script 명령어를 통해 자바스크립트 코드를 실행할 수 있습니다.
검증
assert, assert element present, assert checked 등의 명령어를 통해 테스트하려 하는 대상이 제대로 존재하는지 검증할 수 있습니다. 검증에 실패하면 테스트를 종료합니다.
검증 실패 시 테스트를 종료하고 싶지 않다면, verify, verify element present, verify checked 등의 명령어를 사용하세요.
변수
store, store attribute 등의 명령어를 통해 테스트 도중 필요한 값을 변수에 보관할 수 있습니다.
제어문
스프링 IDE는 if, while, for each와 같이 프로그래밍 언어에서 지원하는 제어문을 제공합니다.
각종 제어문에서는 조건을 검사하기 위해 자바스크립트 표현식을 요구합니다4.
다른 테스트 실행 명령
run 명령어를 통해 다른 테스트를 실행할 수 있습니다.
주석
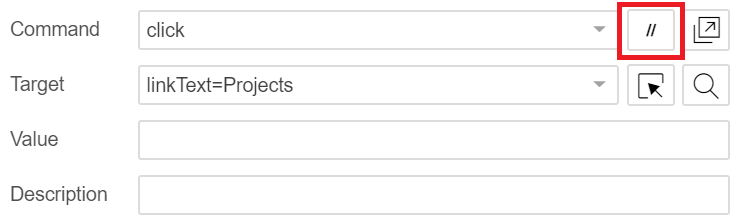
‘Enable/Disable this command’ 버튼을 누르거나 명령어 이름 앞에 //를 붙여 명령어를 비활성화할 수 있습니다. 비활성화한 명령어는 실행되지 않습니다.
타깃
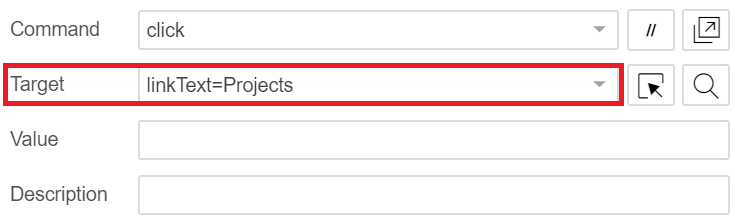
타깃(target)은 명령어가 동작하는데 필요한 <button>이나 <input>같은 HTML 엘리먼트를 의미합니다.
다중 타깃
웹 사이트는 시간이 지남에 따라 내용이 달라지는 경우가 많습니다. 구글 뉴스의 경우, 실시간 정보를 반영하기 위해 짧은 시간을 주기로 계속 그 내용이 바뀝니다. 이외에도 다양한 이유로 내용이 변화합니다.
사람은 이러한 웹 사이트의 변화 속에서도 버튼의 텍스트, 위치, 색상과 같은 다양한 단서를 종합하여 이전과 동일한 버튼임을 추리할 수 있습니다. 웹 사이트가 완전히 개편되지만 않는다면 말입니다.
반대로 컴퓨터 프로그램은 버튼의 텍스트, 위치, 색상과 같은 다양한 단서를 개별적으로 사용할 수는 있으나, 사람과 달리 종합적으로 추리하도록 하기는 어렵습니다. 추리라는 과정을 컴퓨터가 이해할 수 있는 알고리즘으로 설명하기가 까다롭기 때문입니다.
셀레늄 IDE 역시 마찬가지입니다. 셀레늄 IDE는 주로 CSS 선택자나 X패스(XPath)같은 위치 기반 단서를 이용해 같은 버튼임을 파악합니다. 물론 이 방식은 단서를 종합적으로 고려한 것이 아니라 단점이 존재합니다. 위치 기반 단서이기 때문에 웹 사이트의 디자인과 상관 없이 동일한 버튼을 타깃으로 선택할 수 있지만, 버튼의 위치 자체가 바뀌는 경우에는 무척 취약합니다. 이를 보완하기 위해 버튼의 텍스트를 이용해 같은 버튼임을 인지하기도 합니다. 어찌되었든 종합적인 추론 기능은 탑재하고 있지 않습니다.
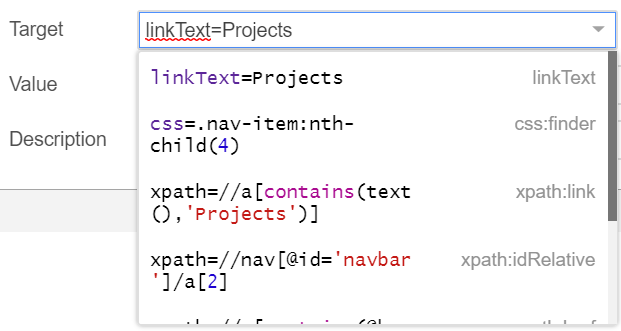
셀레늄 IDE는 이 문제를 해결하지 않습니다. 대신, 사용자가 웹 브라우저에서 수행한 동작을 기록할 때 요소를 파악할 수 있는 모든 방식을 동원해 다중 타깃을 만들어둡니다. 그리고 그 가운데 어떤 방식을 선택할지는 사람에게 맡깁니다.
타깃 선택
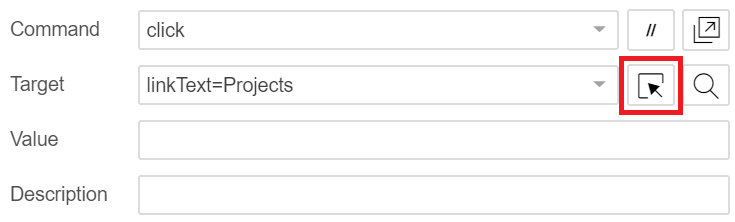
‘Select target in page’ 버튼을 눌러 현재 페이지에서 다른 타깃을 선택할 수 있습니다. 이 버튼은 페이지 내의 다른 타깃을 선택하는 기능일 뿐입니다. 앞서 설명한 다중 타깃과는 무관합니다.
로그
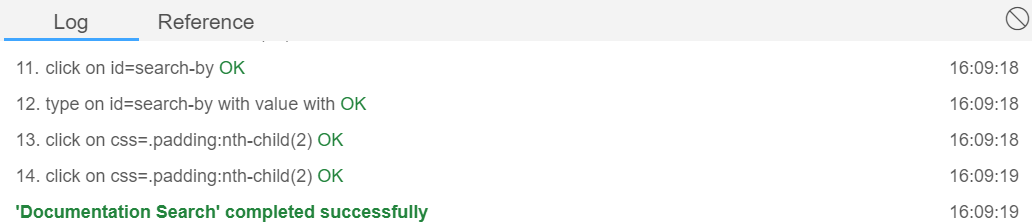
로그 탭에서는 테스트 중 명령어의 실행 시간이나 테스트의 성공 여부를 확인할 수 있습니다.
레퍼런스
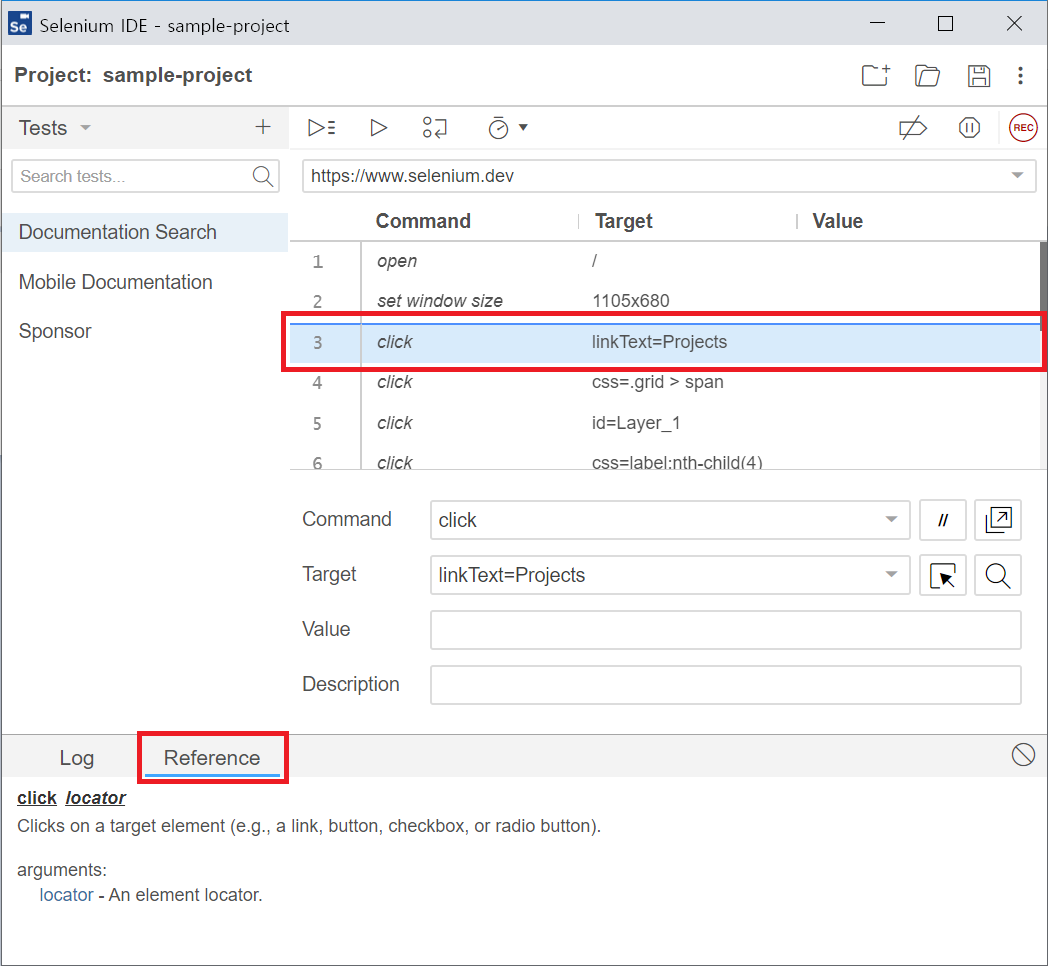
레퍼런스 탭은 선택한 명령어의 사용 방법을 안내합니다. 모든 명령어의 사용 방법을 확인하려면 Commands - Selenium IDE를 참고하세요.
CLI (selenium-side-runner)
selenium-side-runner는 셀레늄 IDE에서 작성한 테스트를 실행하는 CLI 도구입니다.
이 CLI 도구를 이용해 테스트를 기록하거나 편집하는 것은 불가능합니다.
셀레늄 IDE와 달리 더 많은 브라우저를 지원하며, 병렬 실행 기능도 포함합니다. 자동화된 테스트 환경을 만들 경우 셀레늄 IDE 대신 selenium-side-runner를 사용하는 것이 좋습니다.
요약하자면 다음과 같습니다:
| GUI | CLI | .side 파일 |
|
|---|---|---|---|
| 셀레늄 IDE | ✔️ 지원 | ❌ 미지원 | ✔️ 지원 |
selenium-side-runner |
❌ 미지원 | ✔️ 지원 | ✔️ 지원 |
| 사람이 수행하는 동작 기록 | 테스트 편집 | 테스트 실행 | |
|---|---|---|---|
| 셀레늄 IDE | ✔️ 지원 | ✔️ 지원 | ✔️ 지원 |
selenium-side-runner |
❌ 미지원 | ❌ 미지원 | ✔️ 지원 |
| 지원 웹 브라우저 | 테스트 병렬 실행 | |
|---|---|---|
| 셀레늄 IDE | 크롬(Chrome), 파이어폭스(Firefox) | ❌ 미지원 (selenium-side-runner에서 실행 시 병렬 실행되게끔 하는 설정만 변경 가능) |
selenium-side-runner |
크롬(Chrome), 에지(Edge), 파이어폭스(Firefox), 인터넷 익스플로러(Internet Explorer), 사파리(Safari) | ✔️ 지원 |
selenium-side-runner는 버전 8 이상의 노드JS를 기반으로 합니다. 노드JS가 설치되어있지 않다면 노드JS 공식 홈페이지에서 설치할 수 있습니다.
다음 명령어는 selenium-side-runner를 설치합니다:
npm install --global selenium-side-runner
실제로 사용해보기에 앞서 selenium-side-runner를 웹 브라우저와 연결하는 과정이 필요합니다. 이를 위해 각 웹 브라우저에 맞는 웹드라이버를 설치해야 합니다. 웹드라이버의 설치 방법은 수동으로 웹드라이버 파일을 다운로드받는 방법과, npm install을 통해 노드JS 패키지 형태로 다운로드받는 방법이 있습니다. Installing a browser driver - Selenium IDE를 참고하세요.
참고:
npm install을 통해 노드JS 패키지 형태로 다운로드하는 경우 반드시 다운로드된 웹드라이버 자체가 속한 디렉터리를 PATH 환경 변수에 명시해야 합니다. 대부분의 웹드라이버 패키지는 chromedriver같이 웹드라이버 명령어를 제공하기도 합니다만, 이것들은 자바스크립트 코드를 통해 간접적으로 접근하는 명령어이기 때문에 selenium-side-runner가 인식하지 못합니다.
준비가 끝났습니다. 셀레늄 IDE를 통해 작성한 .side 파일을 selenium-side-runner로 실행해봅시다.
다음 명령어는 크롬에서 .side 파일을 실행합니다:
selenium-side-runner my-project.side
크롬 드라이버 대신 다른 드라이버를 사용하길 원할 경우 다음과 같이 해야 합니다:
selenium-side-runner --capabilities "browserName='internet explorer'" my-project.side
selenium-side-runner --capabilities "browserName=edge" my-project.side
selenium-side-runner --capabilities "browserName=firefox" my-project.side
selenium-side-runner --capabilities "browserName=safari" my-project.side
이외에도 selenium-side-runner는 다음과 같은 기능을 제공합니다:
관련 SaaS
- TestingBot: 클라우드 기반의 셀레늄 IDE
-
The move to Electron is a work in progress. We will post updates as progress is made. If you’re looking for Selenium IDE as a browser extension then check out the v3 branch.
-
Why is the location I saved my SIDE project to not remembered? - Selenium IDE
All of these questions are part of the same problem – as a browser extension Selenium IDE does not have access to the file system. The only way to offer “save” functionality is through downloading the file. This issue will be resolved when the IDE moves to a native application. This will give the IDE premier filesystem access, which will enable it to offer a polished “save” experience.
If you want to stay updated, you can follow along with issue 363.
-
Conditions in your application are checked by using JavaScript expressions.